Ras-Pi
Well… I’m a bit late to start with an interesting hardware like Rasberry Pi. But I’m very sure that I can able to explore it easily cause I have been a good time with Linux.
What is Raspberry Pi?
- A low cost, credit-card sized computer.
- Can plug into a computer monitor or TV, and uses a standard keyboard and mouse.
- Capable of doing everything you’d expect a desktop computer to do, from browsing the internet and playing high-definition video, to making spreadsheets, word-processing, and playing games.
Furthermore..
- The Raspberry Pi has the ability to interact with the outside world, and has been used in a wide array of digital maker projects, from music machines and parent detectors to weather stations and tweeting birdhouses with infra-red cameras. We want to see the Raspberry Pi being used by kids all over the world to learn to program and understand how computers work.
Hmm.. that’s cool. Now,
What all we need?
Hardware
- A Raspberry Pi computer with an SD card or micro SD card
- A monitor with a cable (and, if needed, an HDMI adaptor)
- A USB keyboard and mouse
- A power supply
- Headphones or speakers (optional)
- An ethernet cable (optional)
Software
- Raspberry Pi OS, installed using the Raspberry Pi Imager
Installaton Procedure
- Install Rasperry Pi OS on your SD card with the Raspberry Pi Imager
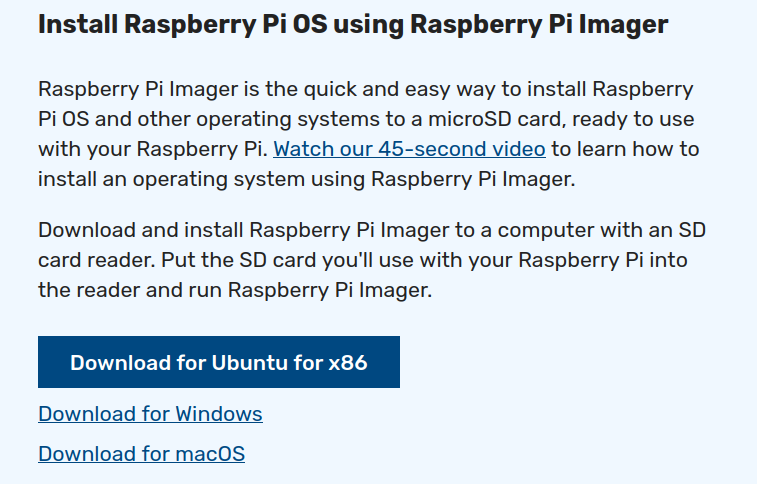
Go to the website and choose the OS you are using or if you are a linux user just typesnap install rpi-imagerin your linux terminal.

- Download and launch the Raspberry Pi Imager
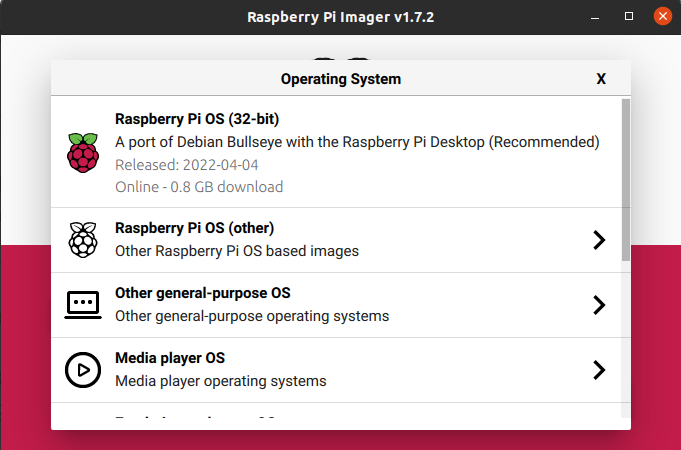
- Using the Raspberry Pi Imager
- First of all format the SD card you are going to use for R-Pi.
- Insert your SD card into the computer or laptop’s SD card slot.
- In the Raspberry Pi Imager, select the OS that you want to install. The first option, Rasperry Pi O, is the recommended OS.
- Select the SD card you would like to install it on. Different platforms will display the drives in different ways. Mac OS, for example, will show you all drives including you main operating sysytem.
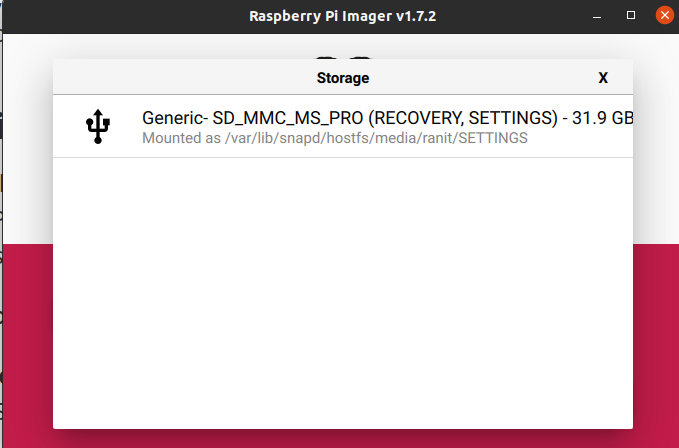
- Note: Make sure you are selecting the correct drive. The drives memory capacity can be a useful indication of which drive you are selecting.

- Once you have selected both the OS and the SD card, a new WRITE button will appear. Simply click on it.
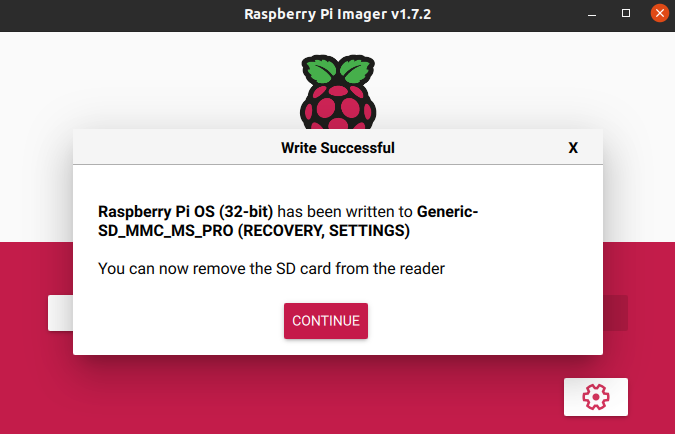
- Wait for the Raspberry Pi Imager to finsh writing.
- Once you get the following message, you can eject your SD card.
-
Hello! Rasberrypi
You are going to take a first look at Raspberry Pi! You should have a Raspberry Pi computer in front of you for this. The computer shouldn’t be connected to anything yet.
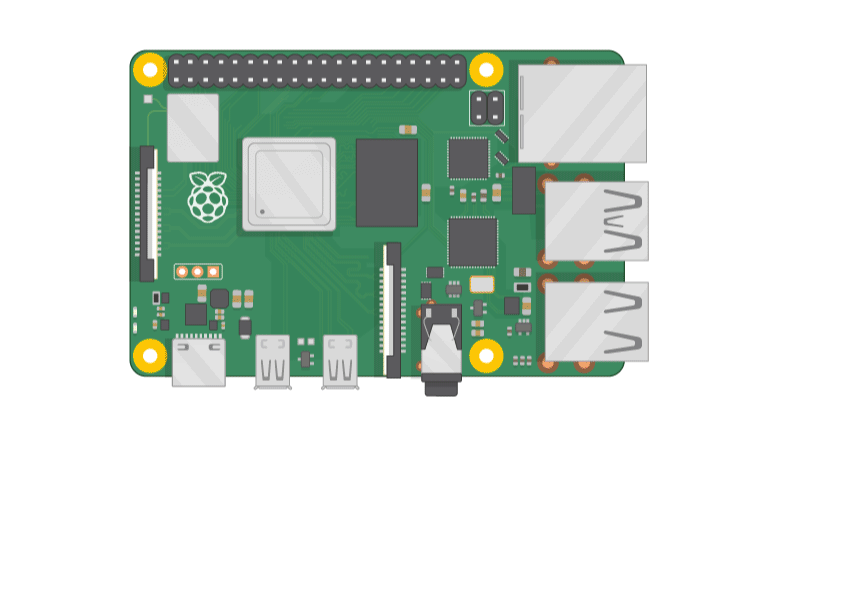
- Have a look at your Raspberry Pi. Can you find all the things labelled on the diagram?
- USB ports — you can connect your mouse,keyboard or other components like a USB drive in these ports.
- SD card slot — you can slot the SD card in here. This is where the operating system software and your files are stored.
- Ethernet port — this is used to connect Raspberry Pi to a network with a cable. Raspberry Pi can also connect to a network via wireless LAN.
- Audio jack - you can connect headphones or speakers here.
- HDMI port — this is where you connect the monitor (or projector) that you are using to display the output from the Raspberry Pi. If your monitor has speakers, you can also use them to hear sound.
- Micro USB power connector — this is where you connect a power supply. You should always do this last, after you have connected all your other components.
- GPIO ports — these allow you to connect electronic components such as LEDs and buttons to Raspberry Pi.
- Let’s connect your Raspberry Pi
- Check the slot on the underside of your Raspberry Pi to see whether an SD card is inside. If no SD card is there, then insert an SD card with Raspbian installed (via NOOBS).
- Note: Many microSD cards come inside a larger adapter — you can slide the smaller card out using the lip at the bottom.
- Find the USB connector end of your mouse’s cable, and connect the mouse to a USB port on your Raspberry Pi (it doesn’t matter which port you use).
- Connect the keyboard in the same way.
- Make sure your screen is plugged into a wall socket and switched on.
- Look at the HDMI port(s) on your Raspberry Pi — notice that they have a flat side on top.
- Use a cable to connect the screen to the Raspberry Pi’s HDMI port — use an adapter if necessary.
- Now! nothing is displaying on the screen right? is it even running?
- If you want to connect the Pi to the internet via Ethernet, use an Ethernet cable to connect the Ethernet port on the Raspberry Pi to an Ethernet socket on the wall or on your internet router. You don’t need to do this if you want to use wireless connectivity, or if you don’t want to connect to the internet.
- If your screen has speakers, your Raspberry Pi can play sound through these. Or you could connect headphones or speakers to the audio port.
- Plug the power supply into a socket and then connect it to your Raspberry Pi’s USB power port.
- You should see a red light on your Raspberry Pi and raspberries on the monitor.
- Your Raspberry Pi then boots up into a graphical desktop.
- Damnn let’s finish the setup.. it’s too much now 😤
- When you start your Raspberry Pi for the first time, the Welcome to Raspberry Pi application will pop up and guide you through the initial setup.
- Click Next to start the setup.
- Set your Country, Language, and Timezone, then click Next again.
- Enter a new username and password for your Raspberry Pi and click Next.
- Set up ypur screen or screens.
- Connect to your WiFi network by selecting its name, entering the password, and clicking Next.
- Note: if your Raspberry Pi model doesn’t have wireless connectivity, you won’t see this screen.
- Click Next let the wizard check for updates to Raspbian and install them (this might take a little while).
- Click Restart to finish the setup.
- Hell yeahhh.. it’s working
- Let’s tryout this pocket dynamite xD.
- Do you see the raspberry symbol in the top left-hand corner? That’s where you access the menu: click on it to find lots of applications.
- Click on Accessories, and then click on Text Editor.
- Type
I just setted up a Raspberry Pi 4 computerin the window that appears. - Click on File, then choose Save, and then click on Desktop and save the file as
rp.txt. - You should see an icon named rp.txt appear on the desktop.
- Your file has been saved to your Raspberry Pi’s SD card.
- You can use linux commands like
ls,cdetc in the terminal as the Pi is non other than linux OS only. - Anyway let’s delete the random file we have created. Just drag
rp.txtfile and drrop it to the Wastebasket like this.